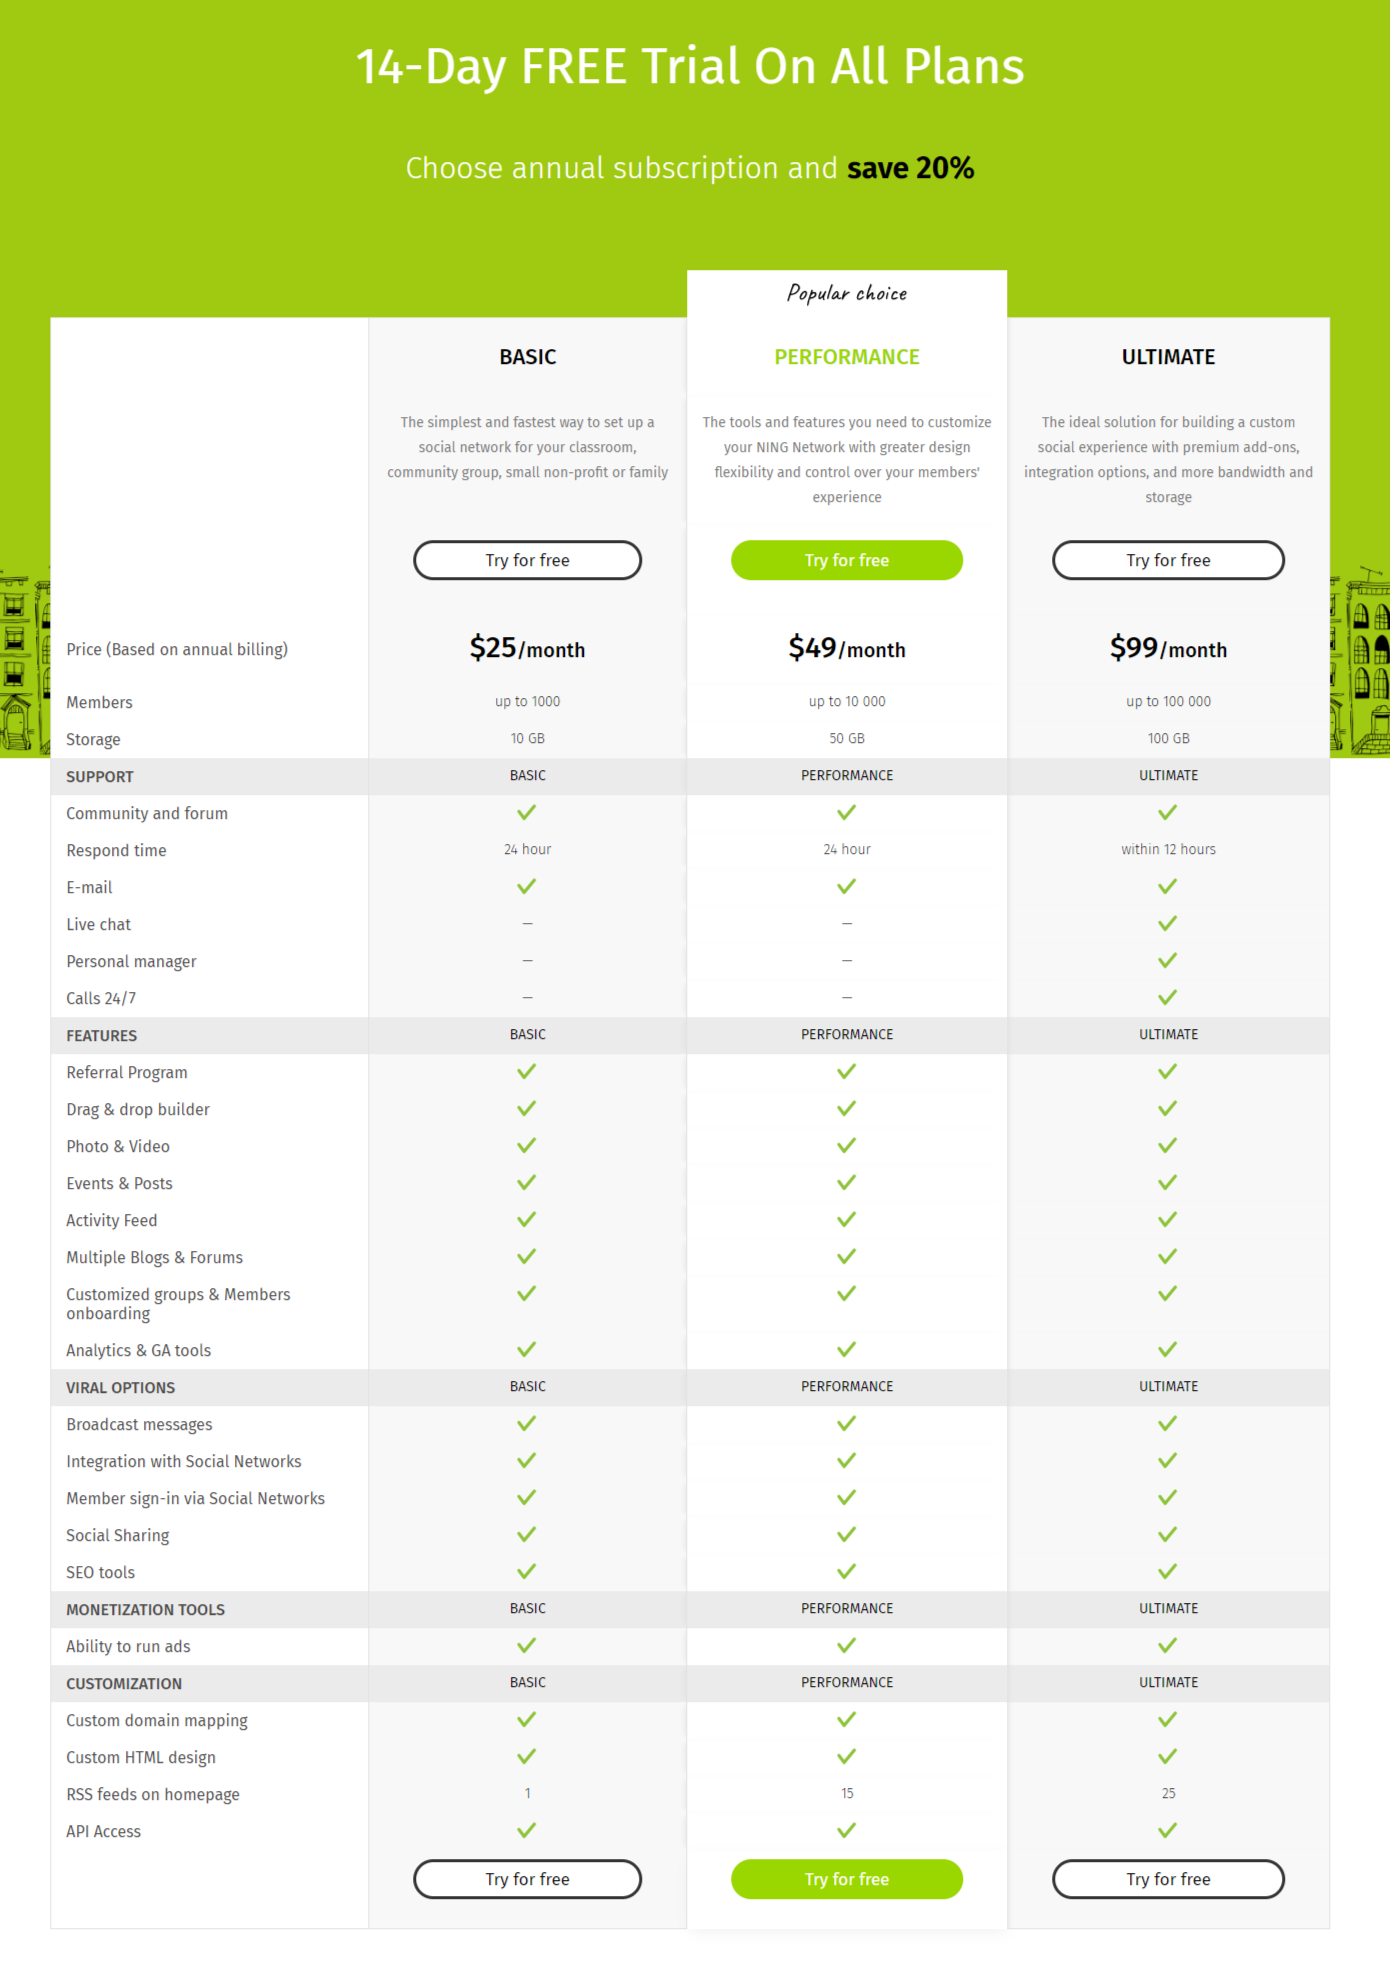
Ning Networks come in three plan level options: Basic, Performance and Ultimate. You can learn more about these plans on this page: https://www.ning.com/pricing.
Each plan gives you pretty much the same set of features on your Ning 3.0 Network, with a couple of exceptions:
- A redesigned Blog feature
- Page and layout flexibility, including the ability to create multiple instances of each feature
- Granular controls for privacy, contributors and moderation for each page and feature instance
- A simple and powerful Design Studio
- A redesigned Photos feature
- Social Commenting options (Facebook and Disqus)
- Responsive Design for a better mobile experience
- Member Categories and Feature-based permissions
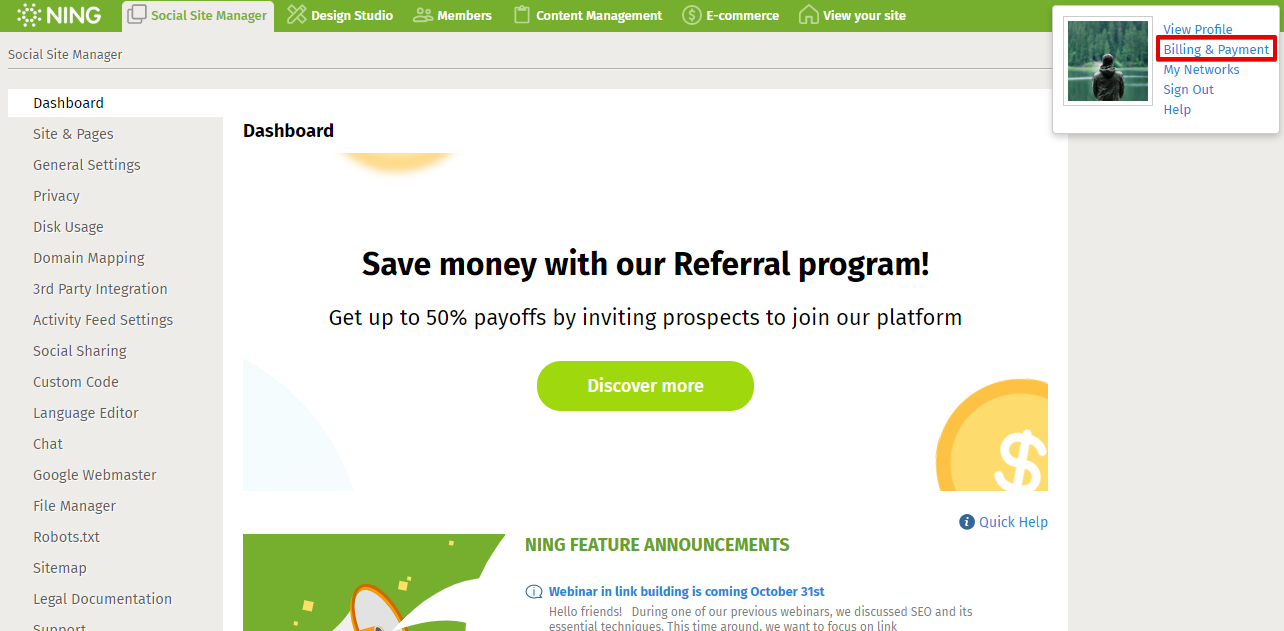
If you would like to upgrade, you can click on the “My Account” link from your network’s dashboard, then click on the “Billing & Payment” link, which will take you to your account at https://www.ning.com.
You can also access your account from https://www.ning.com directly.
Once there, click on the My Networks tab on the side. This will take you to your networks on this account. From here, find the network whose plan you’d like to upgrade. Click on the “Change Plan” link.
You’ll be taken to a form that you can fill out and submit. This will reach us in the Help Center, where we can confirm with you the plan you’d like your network to be upgraded to, and make this change on your behalf. Let us know which plan you’d like, and if you’d prefer to be on a monthly or annual plan.
Once we’ve upgraded your plan, we’ll write you back to let you know. You’ll be all set after that!


