To enable members to sign up with their Twitter account, you need to create a Twitter app first. You must be registered as a developer on https://developer.twitter.com.
- Create your Twitter App on Twitter’s website.

- Fill in the required fields in the “App details” tab and specify your network URL, e.g., https://network-name.ning.com
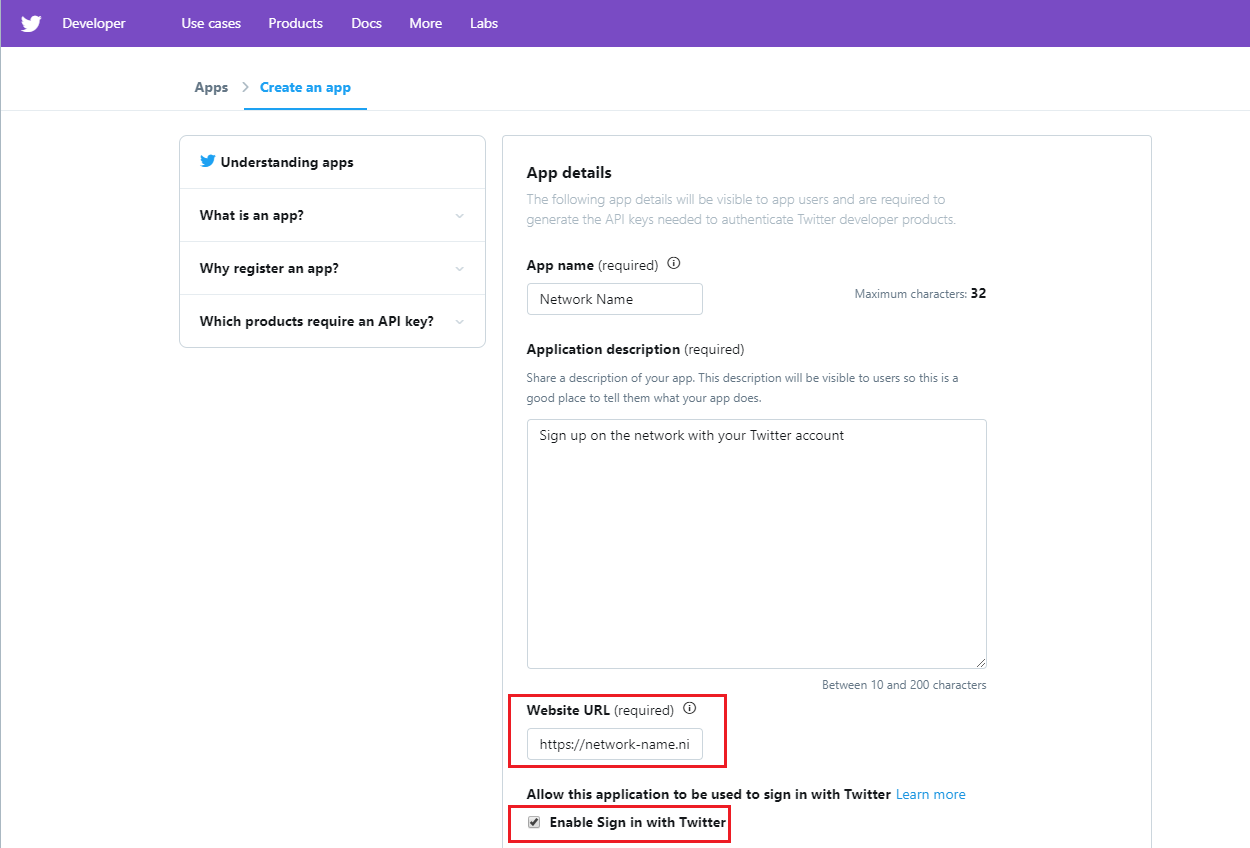
- Check the “Enable Sign in with Twitter” box.
- Fill in the “Callback URLs” field with the following URL: https://auth.ning.com/socialAuth/twitter
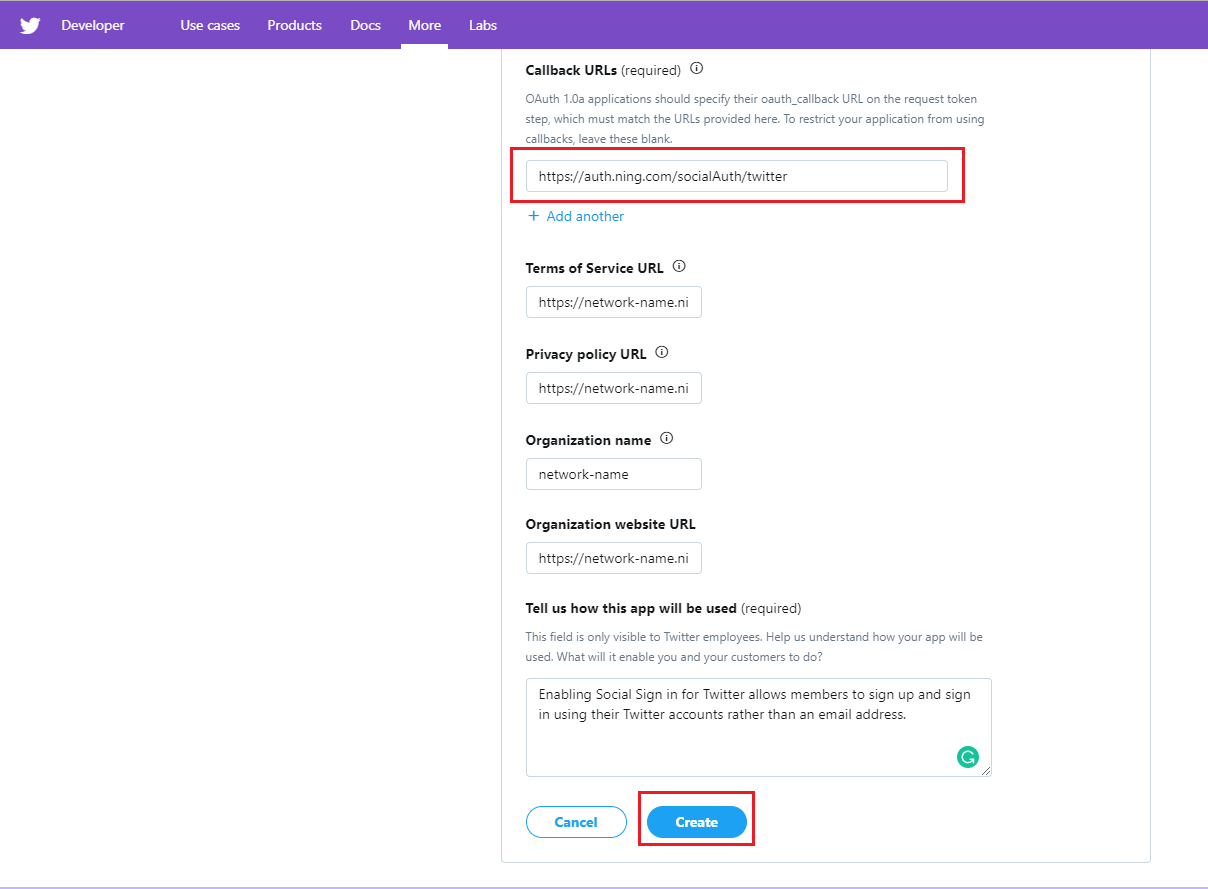
- Click “Create”.
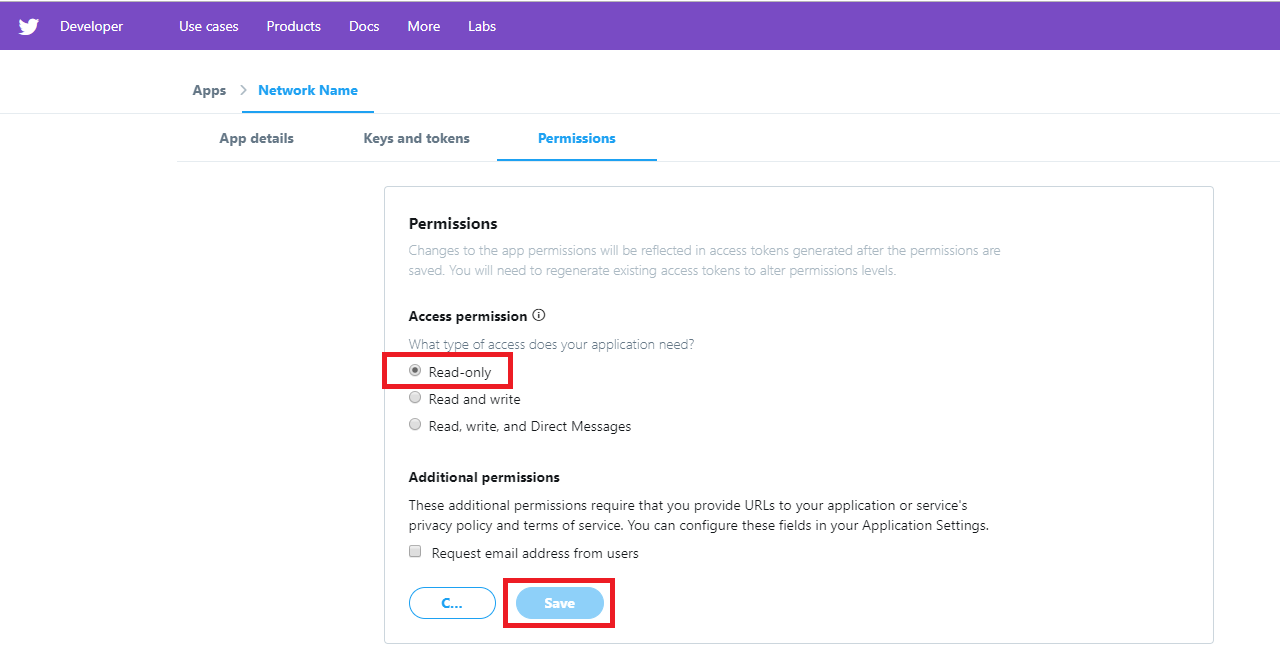
- In the “Permissions” tab, set “Access permission” to “Read-only” and save the settings.
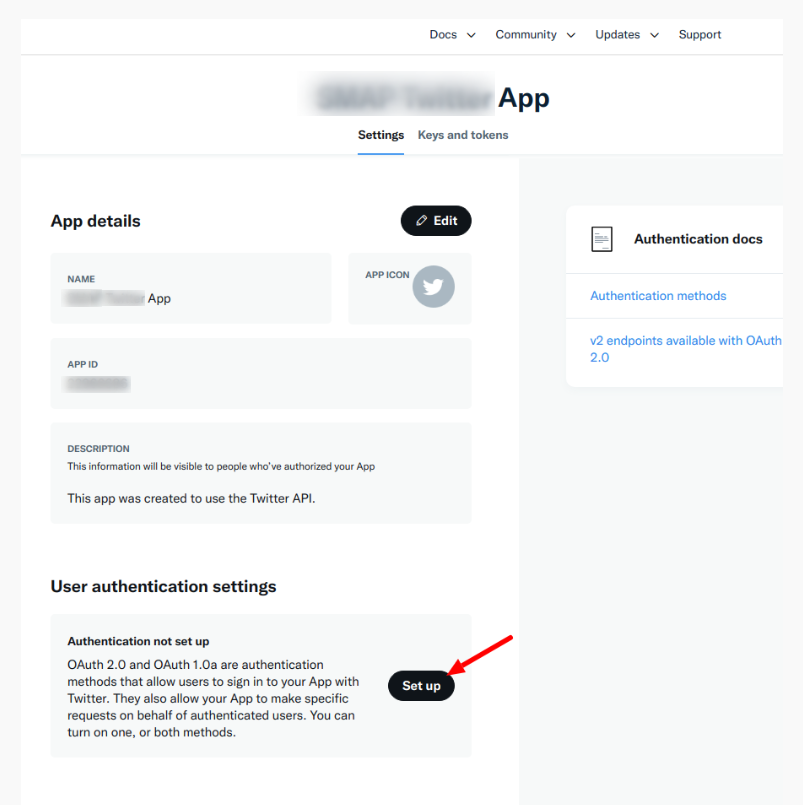
- Сlick on the “Set up” button in the authentication section.
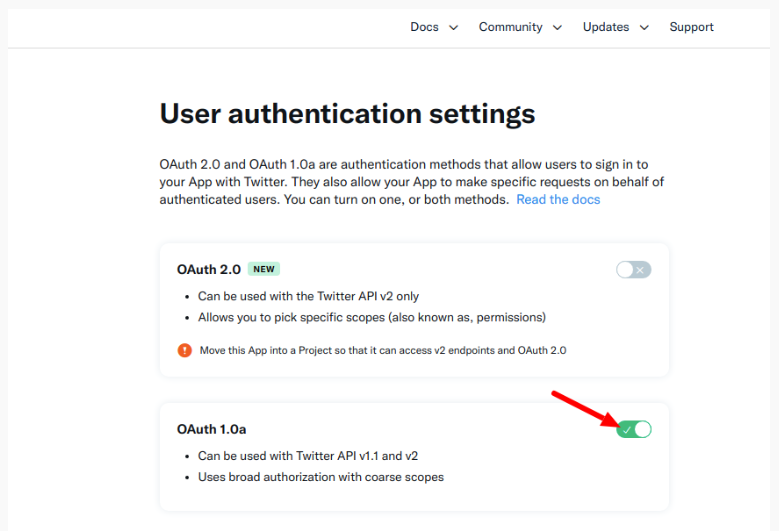
- OAuth 2.0 must be disabled as it is shown on a screenshot, and OAuth 1.0 enabled
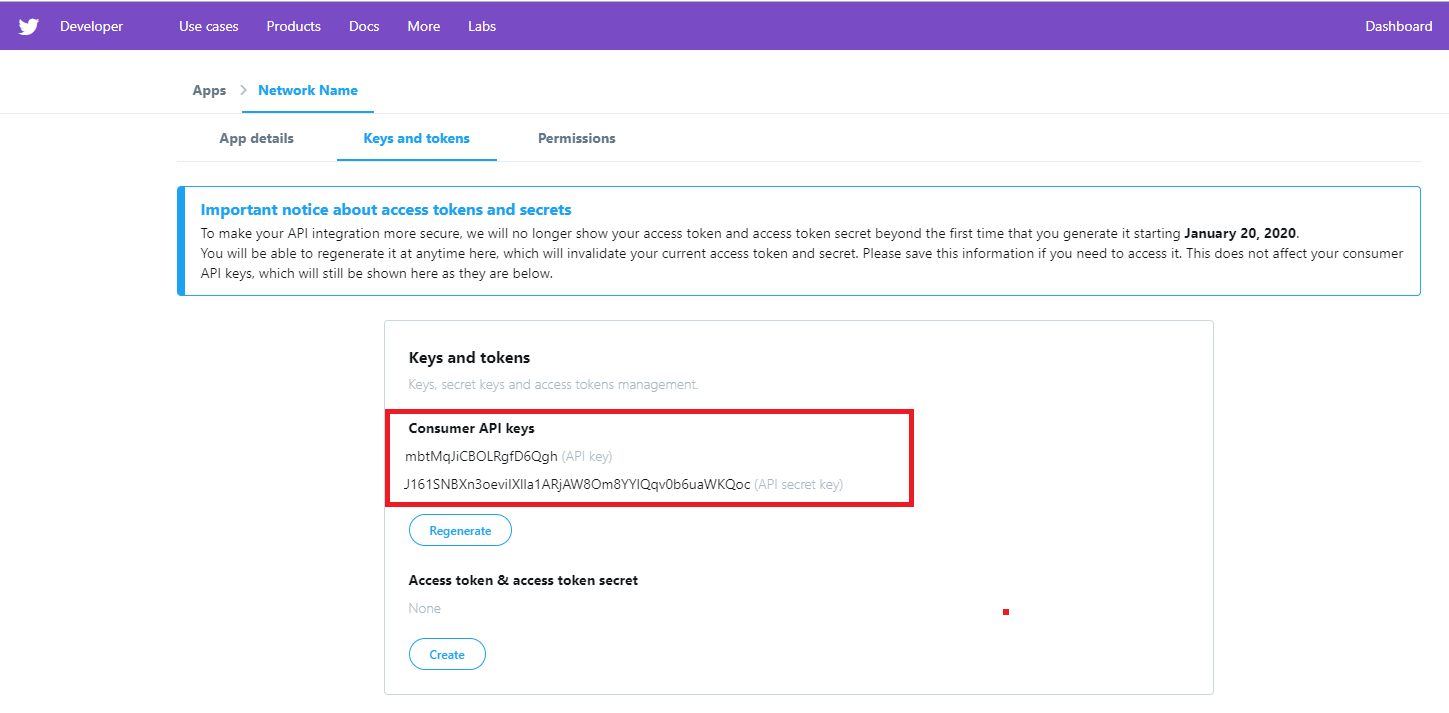
- Go to “Keys and tokens” and copy your API key and API secret key.
- Paste the API key and API secret key in the corresponding fields of the pop-up that appears in the Sign Up & Sign In page of your NING admin panel.
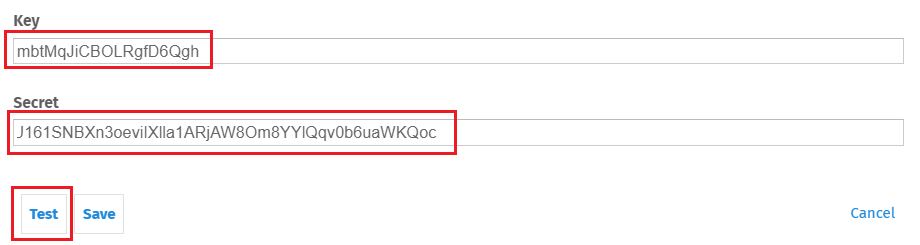
- Click “Test”.
- In the newly opened window, log in using your active Twitter account.
- If the settings are correct, a notification will appear, confirming that the test was successful. Click Save to save the settings.
Similar Articles:
- None Found