Groups are a great way to organize members of your Ning Network around a topic, interest or region. To create a group, go to the Groups hub page, then click the “+” button.
You’ll now be able to edit your group’s basic information as well as adjust a few privacy and permission settings.
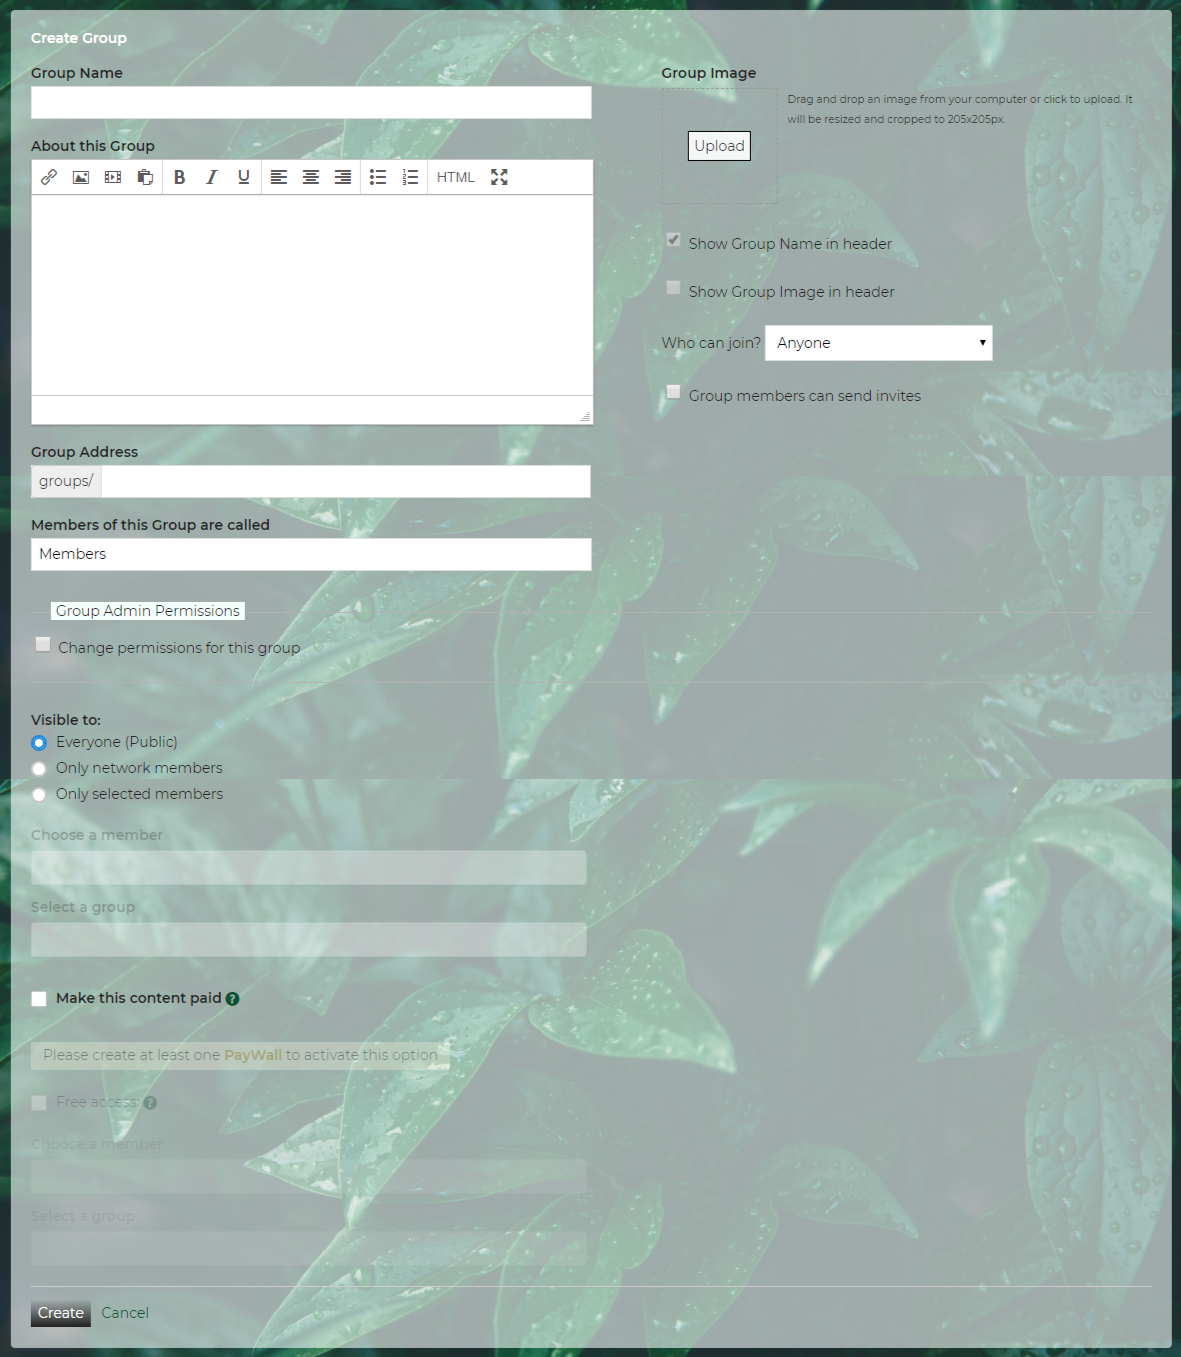
Fill in information about your group:
- Give your group a name
- Fill out a description for your group
- Edit the group URL
- Customize how you refer to group members
- Upload a group image (use one that’s roughly square in size to avoid it getting distorted)
- Add a cover photo
- If your group has another website, or a location, you can add it here!
If you’re creating a group that’s a bit more exclusive, you can also set who can join the group as well as who can send invitations.
There are also group admin permissions settings, which you can use to really tailor how group administrators can manage a group. You can set whether admins can:
- Add/ Delete group pages
- Message group members
- Upload cover photos
- Edit the group’s layout
When creating a Group, a Comment Wall is included. Comment Walls allow members of the Group to leave comments on the Group page rather than only on Blog posts. You can choose between Facebook comments or any of the native comment styles that we provide.
To learn more about native comment styles, see Types of Comments
Click “Create” and your group will be added to the Ning Network!


