The Ning 3 photo uploader allows you to add multiple photos at a time. The following formats are supported: .jpg, .png and .gif.
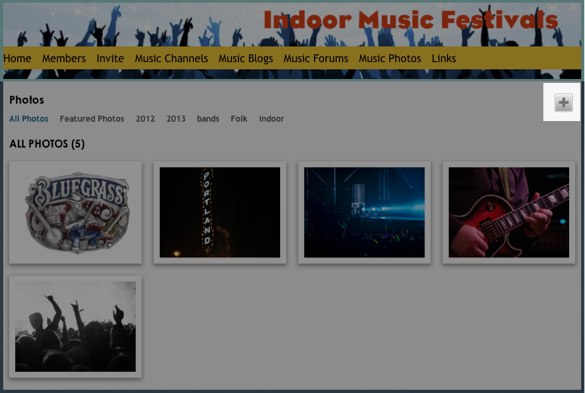
To add a photo, go to the Photo page and click the + sign. From here, you can select a photo or multiple photos to upload from your computer. This + button will appear on all photos and the photos listing page.

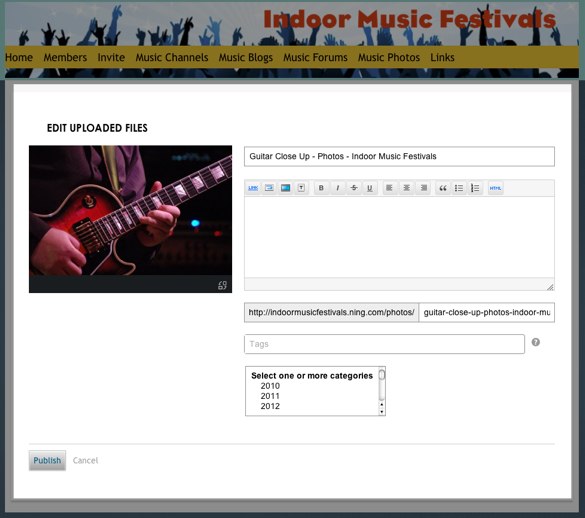
Once you upload the photo, you can add a title and caption. You’ll also be able to delete, rotate and apply tags if you’d like. By default, we’ll generate a link for your new photos, but you will have the option to change the URL to something else.

When you’re done making changes, click the “Publish” button. After you publish the photo, you’ll be brought to the photos listing page where you can see all the photos.
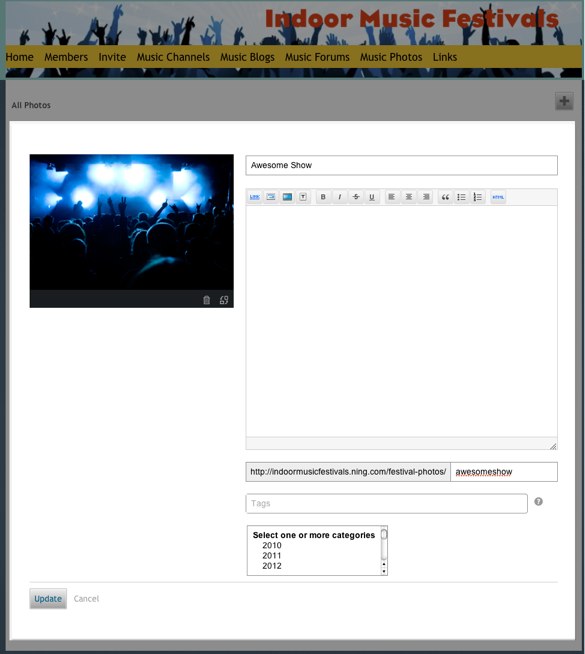
After uploading a photo to your Ning Network, you can always go back and edit it. You can rotate the photo, add or edit the tags you’ve given it, change the title, description, location, category and URL.

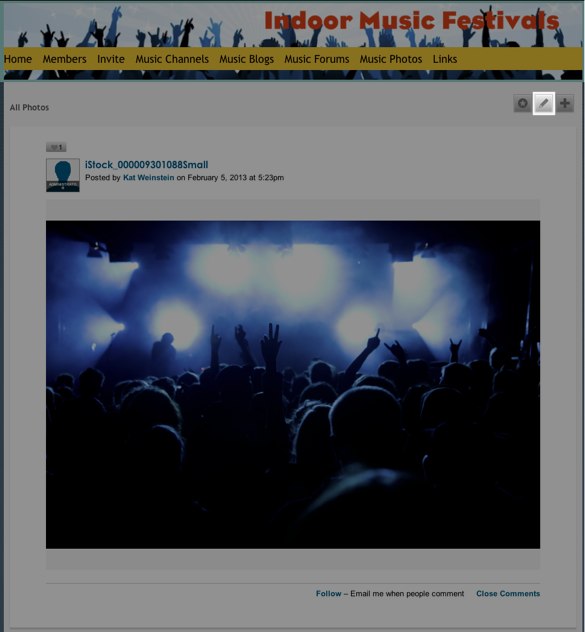
To edit a photo you’ve uploaded, head to that photo’s detail page. At the top, you’ll see the pencil icon. Simply click it to access the edit options.

Here you can make any or all of these changes to your photo.
Once you’ve made your changes, click “Update” to save the changes. You can also click “Cancel” to leave the photo the way it was.


