With the bulk uploader on your Ning Network, you can add up to 100 photos at a time. The following formats are supported: .jpg, .png, and .gif.
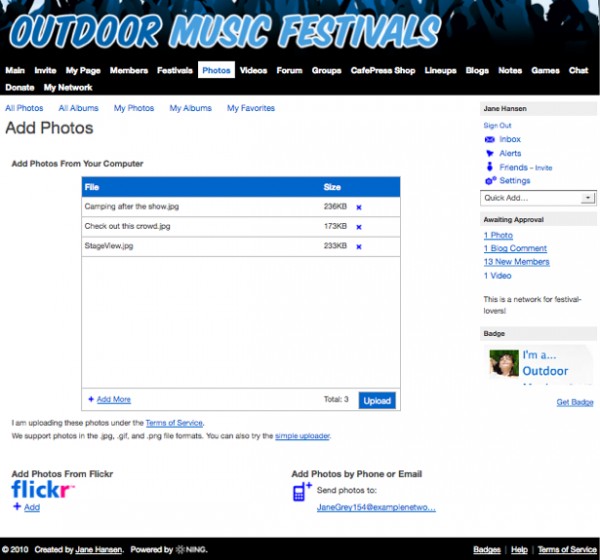
To upload photos using the bulk uploader, go to the Photos page and click the “Add Photos” link. Then, click the camera icon to select which images you’d like to upload from your computer.

If you want to select multiple photos at a time, just hold down the “Control” or “Command” key on your keyboard and click each photo. Photos you’ve chosen to upload will display as a list in your bulk uploader.

After you add one batch, you can add even more photos to the list with the “Add More” link, and remove any using the “X” button to the right of each photo. Once you’re ready to upload, click the “Upload” button.
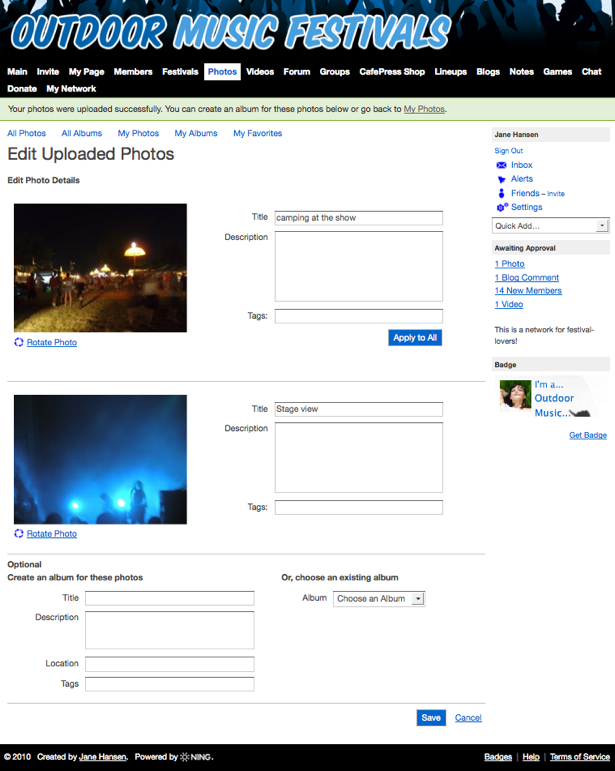
On the next page you’ll be able edit the “Title,” “Description” and “Tags” field for each photo. You can also choose to create a new album for those photos or to add them to an existing album. When you’re done, click “Save” if you’ve added more information. You can also click “My Photos” at the top of the page to immediately start browsing your newly uploaded photos.

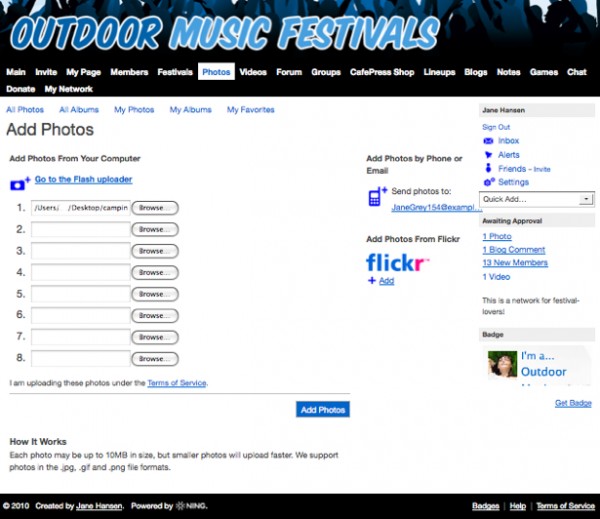
To upload photos individually, you can also use the simple uploader, located just under the bulk uploader.

Add one photo to each field using its “Browse” button. When you’re finished, click the “Add Photos” button.

When the upload completes, you’ll be able to add the photo to an album and edit its information on the next page, just as you would with the bulk uploader.
