By default, your My Page automatically takes the theme and appearance settings of the network. If the Network Creator enables this option, you can change the theme and appearance of your own My Page.
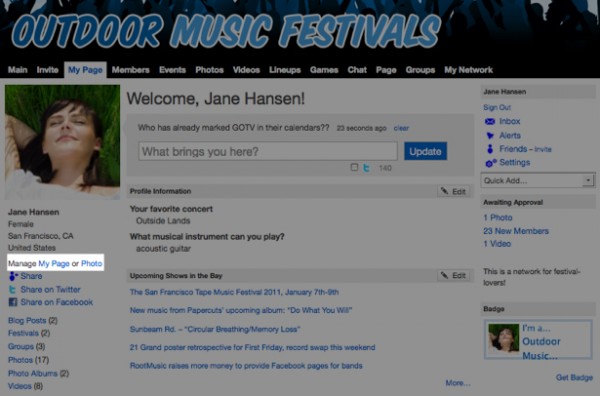
To change your theme, go to your My Page and click the “My Page” link underneath your profile photo. (If this link doesn’t appear, it means the Network Creator has disabled this option.)

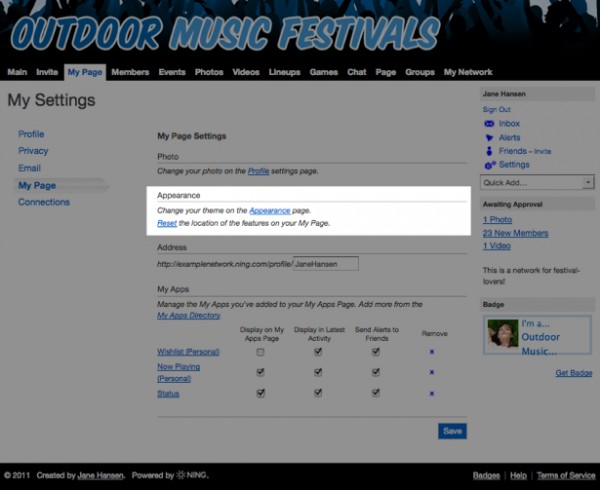
You’ll be taken to your My Page settings page. Find the Appearance section and click the link to begin making changes.

You’ll be taken to an Appearance page just for your profile. In the top portion of the page, you can browse through the themes currently available and test them out on your My Page.
You can further customize your page’s appearance by changing the font and colors of the theme you’ve chosen. Select the theme you’d like to customize and scroll to the “Now, make it unique” section of the page.
To make additional changes to your page’s appearance, you can add your own CSS, or Cascading Style Sheets. With CSS, you can make changes to your page’s appearance that aren’t available in the built-in theme settings page. If you’re interested in learning more about CSS to customize your page, we recommend checking out W3C’s CSS section and downloading Firebug to experiment.
To restore the default settings to your My Page, just click the “Apply (your network)’s Theme” button on this page. Click “Save” at the bottom to activate your changes.
