To have your Ning Network name display on member Twitter updates, or to enable people to sign up on your network with their Twitter accounts, follow these steps to easily create your own Twitter App in a matter of minutes.
Step 1: Go to your network’s Twitter Integration page
Click on your My Network tab to be taken to your dashboard. Under the Tools section, click on the “Twitter Integration” link. On this page, click the “Create Twitter App” button to get started.

Step 2: Sign in to Twitter
Sign in to Twitter. If you don’t already have a Twitter account, you can sign up at the Twitter home page to create one.
Step 3: Create your Twitter App

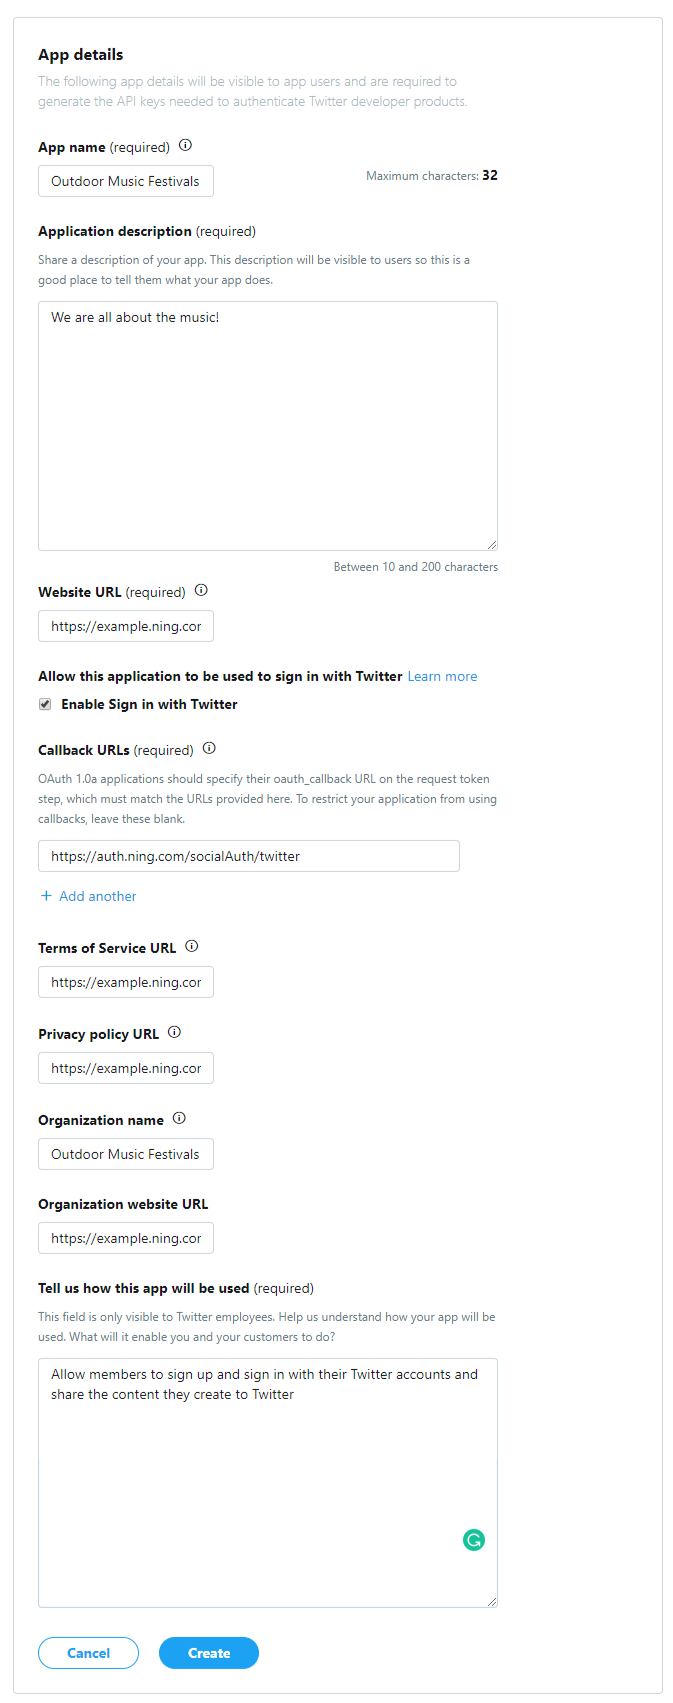
a. After you sign in, you’ll be taken to your application creation page. Be sure to fill in your application’s name, a description about your application and your Ning Network’s URL in the WebSite field.

App Name: Enter the name of your Ning Network. This will be displayed on each member’s Twitter update.
App Description: Give a description of your Ning Network.
WebSite URL: Enter in the web address of your Ning Network, for example, http://yournetworkname.ning.com
Check the box next to where it reads, “Enable Sign In with Twitter.”
Callback URL: Enter the following URL: https://example.ning.com/profiles/connections/twitterCallback
Terms Of Service and Privacy Policy URL: You can use the following links, but do not forget to change “example” to the subdomain of your network
https://example.ning.com/main/authorization/termsOfService https://example.ning.com/main/authorization/privacyPolicy
Organization name and URL: Organization fields are optional and can be left blank.

b. Read and agree to Twitter’s “Developer Terms”. Hit “Create” button.

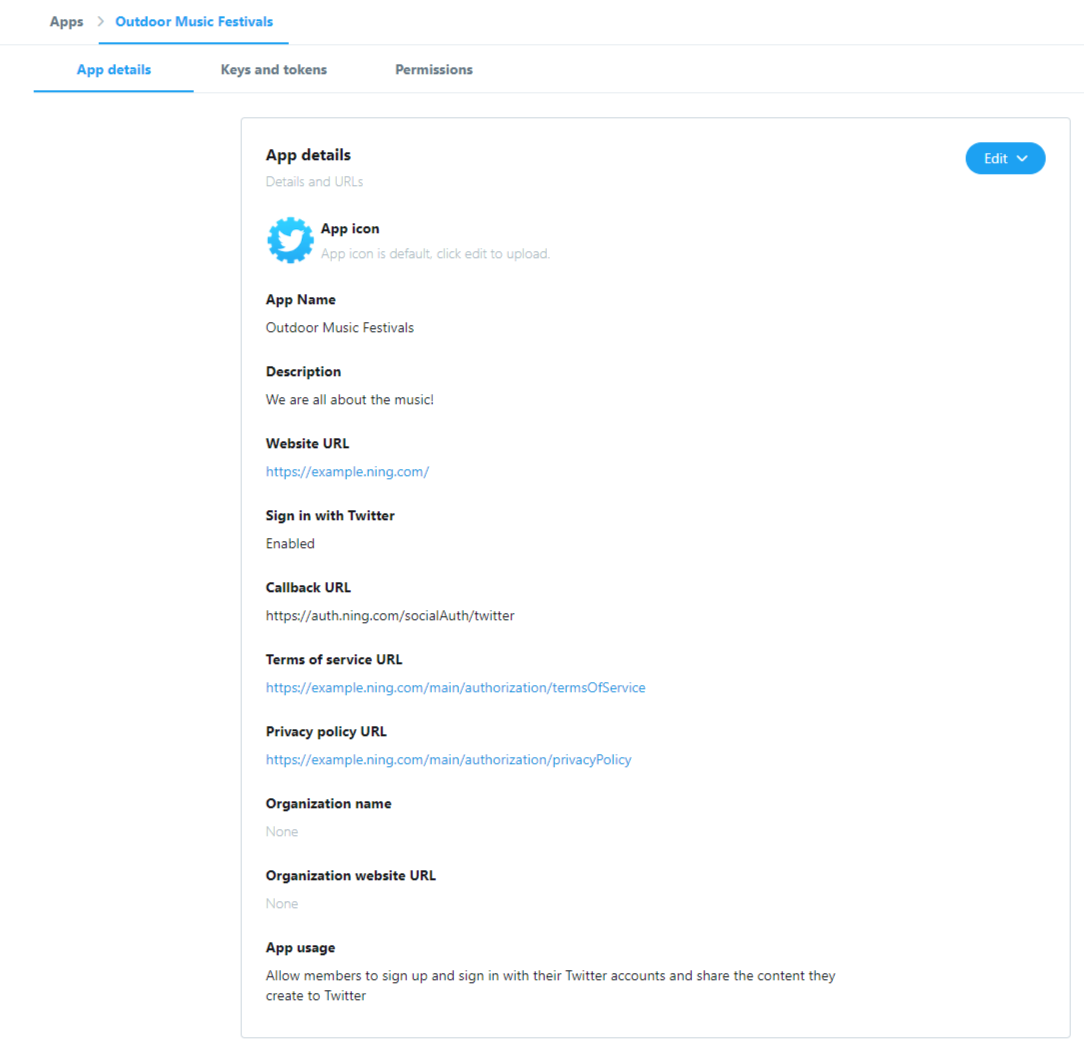
c. Doing this will take you to your Twitter app’s detail page. App icon field is optional and can be left default.
Switch to “Permissions” tab and check Access permission field. It should be set to “Read and Write” by default to enable members to post to Twitter.

d. Switch to “Keys and tokens” tab. You’ll need your Consumer API key and Consumer API secret, found here, to paste back into your network’s Twitter Integration page. Save these for the next step.

Step 4: Update your Twitter App on your Twitter Integration page
a. Copy the Consumer key and Consumer secret from your Twitter app’s detail page and paste them into the “Update Twitter App” lightbox back on your network’s Twitter Integration page.

The box next to “Members can post to Twitter directly…” is checked by default. If you want members to be able to post to Twitter, leave this as is.
Click on the “Update” button, then click “Save” to finalize your changes.
Congratulations! You’ve created your own Twitter app. Now member tweets from your Ning network will display “from [Your Ning Network Name]”.
Update your current Twitter Application settings
If you decide later on that you want to change how your Network Name is displayed in the tweet timestamp or reset your Consumer key and Consumer secret:
a. Sign in to your Twitter account.
b. Click on the “Developers” link at the bottom of the page to go directly to http://dev.twitter.com.
c. Hover your mouse over your name to open up a drop-down menu. Click on “My Applications” to see your Twitter apps.

d. Click on the app you’d like to edit.
e. Click on the Edit button at the “App Details” tab if you’d like to make changes to your Twitter application settings, such as changing how your Network Name is displayed in the tweet timestamp.

f. Click on the “Keys and tokens” tab if you’d like to reset your Consumer key and secret.

From the Twitter Integration page on your Ning Network, click on the link “update your Twitter Key and Secret” and enter in your new Consumer key and Consumer secret and click on the “Update” button.
After you’ve created your Twitter application, you can then enable your members to sign up and in to your network with their Twitter account credentials! For more information, see: Enable Social Sign In with Twitter.
